

Sign up for One-Stop Solutions

How to open the nozzle of Imaje 9232 / 9410 / 9450 inkjet printer?

Click on “Tools”:   There’s a “nozzle maintenance operation” in the tool:   Click “OK”:   Then, there’s a “through nozzle” and “solvent suction”:   If you click “Get through the nozzle”, the nozzle will always crack here:   To see if the ink line is open, if the ink line is open to the recycling tank, you can click “Close ink line”:   If you can’t get through the nozzle, we can click solvent inhalation:   If you choose to inhale the solvent, spray the cleaning liquid into the nozzle with the cleaning liquid, let it suck in and suck the dirty things in:   If the nozzle has not been opened, continue to open the nozzle,  “Solvent suction” and “open nozzle” these two to cycle until the ink line is very stable:   We can click on the “ink line stability check” to see the stability of the ink line, that is to say, hit the location of the recycling tank, whether jitter:   Then after all is OK, we can click “close the ink line”, and then we wash this side of the nozzle, there are dirty places, we can clean it: For example, recycling tank, as long as there is dirty place, you can wash it clean.Then, after washing, be sure to blow dry. After blow-drying, we click “Start Ink Line”:   Then, we heard the sound of recycling, indicating that the ink line has been opened:   Observe whether the position of ink line is

Continue Reading

How to assemble Imaje 9020 inkjet printer ink core?

Now it’s been taken apart by me:   Then the first step, let’s see how the diaphragm is installed, First we’ll put this on:   Then put the diaphragm up, the diaphragm has no positive or opposite, this is a vacuum, let’s install it:   Here are holes, we put it round well, holes must be one-to-one correspondence:   After installation, we put the fixing piece on, the hole inside also has to correspond one by one:   At this time, we can put the screws on,do not tighten them all at once,After the screws are installed, slowly tighten them:   Then we tighten them one by one:   Let’s install it:   Then, install the screw: Be careful when installing, do not scratch this surface.   Install a screw here:   Then, hold it down and tighten the screw in the middle:   After tightening the middle screw, remove the outside screw:   Once this is installed, we will install another diaphragm, Let’s match the holes in the inner ring first, and the outer ring doesn’t care about it first:   Fix this first:   Put the screws on and tighten them one by one:   Then we’ll install this,look for holes:   Let’s screw the screws:   Tighten the screws and the diaphragm is installed:   This do not install the opposite, its holes are one-to-one corresponding:   At this time we can replace the main filter. Unplug it, and then we’ll just install it mouth-to-mouth:   We fixed

Continue Reading

How to clear the trouble of Imaje 9232/9410/9450 inkjet printers?

We click on Password:   Then we must hold down this advanced password button for more than three seconds, and release it:   Then we enter the current password:   The current password is the password for this date:   Then we enter the advanced password and click OK:   “Password modification successfully” appears on the screen:   In this case, let’s click on this fault:   There’s a “Clear All” button here, and we can click on it:   This fault has been cleared:

Continue Reading

How to solve the alarm problem of Imaje 9232/9410/ 9450 inkjet printer?

It will report a lot of warnings, such as the power failure of the nozzle, and a series of failures such as the high ink level detected by the solvent, If the power is turned on and the screen only shows when the pump is not running, so many warnings will be given:   In general, there may be a problem with the board on this side of the nozzle:

Continue Reading

How to install the mainboard and ink core of Imaje 9020 inkjet printer, and how to remove the high pressure pack and pipe?

We put all the wires aside and plug the motherboard in directly:   Put the screws on:   Plug in the lines: Once the wiring is plugged in, the motherboard is installed.   If you take apart the high-pressure package, just remove the two screws on the back: These two screws, is fixed high-pressure package, these two screws removed, high-pressure bag can be removed.   If we remove the pipe, we only need to remove the following four screws: Then, as soon as you take it from below, it will fall off.   And then there’s the line:   The wire is on the side of our machine, and we pull it out, and then we cross it from there, and the pipe can be removed:   Let’s see how the ink core is installed, Let’s take it off: Don’t lose the O-ring inside.   Then we’ll take the ink core up:   Then we open the plug on this side:   Then, fit them, insert the slots, and then install the three screws on the top and tighten them:   Here’s a line, and we plug it in, and the line is above the pipe:   Once we’ve plugged it in, let’s put it in:   Then there are two screws:   Plug the pipe, and then, on the fan, try not to let it rub against the cable: Do not install the baffle. Let’s test whether the ink core is installed.   First power on, then let’s run it

Continue Reading

How to disassemble and install the print head of Imaje 9410 inkjet printer?

Let’s see how this nozzle is removed, unscrew the screw: Then the nozzle was removed:   The installation is the same, get it stuck, and tighten the screw:   If you want to remove the recycling tank, first unplug the line on the rear sprinkler board, then remove the screw, and then pull the recycling tank out:   Let’s see how the sprinkler board is replaced, and we’ll first remove the four screws:   Then we take off the four screws above:   Then this one can be taken away:   There is a nozzle solenoid valve here, if we want to remove it, put it on top of two screws can be removed as soon as it is loose: It’s the same when you install it, just get stuck in it and tighten the screws. Let’s look at the back, we take the back cover off, the circuit board is here. Remove a few screws from the back cover, you can open the lid:   Then unplug the line and the lid can be taken down:   Then, if we want to take this board apart, we just need to unplug the wire:   This row is directly connected to the recycling tank, if you want to remove the recycling tank, first remove this row, and then loosen the screw, and then pull the recycling tank out:   Let’s look at the circuit board, and the two screws on it can be removed:   We took the line down, pulled

Continue Reading

Inkjet printer technical guidance-1

We have produced a lot of text and video materials in response to the problem that many users are not familiar with the use and maintenance of inkjet printers. We will explain each model by model. I hope that everyone will read my text information and find the video or text of the technical guidance you need. These text and video materials include equipment repairs and replacement parts, and some routine troubleshooting. There are also videos of the installation and debugging of some equipment. The overall length is relatively long, you can use the search function to directly find the text or video you need, such as searching with keywords. The first one is the understanding of the accessories of Domino GP-A120/A220 series. The following video will have the names of the main accessories of the machine. The following videos are the repair and assembly of Domino GP-A120/A220 series machines: 1. Domino A120 assembly video-valve assembly-module pipeline and sensor assembly-viscometer assembly-pump cleaning and assembly-liquid level sensor replacement 2.Domino A120 assembly video-Viscometer troubleshooting 3.Domino A120 assembly video-ink flow 4.Domino A120 assembly video-valve cleaning and precautions 5.Domino A120 assembly video-Ink diverter block explanation-  

Continue Reading

How to assemble imaje 9029 inkjet printer’s Mixing tank?

Let’s take a look at how to install the mixing cylinder of the 9029 machine Let’s install the solvent pump first, Get it on first: The screws should be loosened a little, not so tight: Then we’ll tighten it up: Then we put this fixed block down,be careful when placing Pay attention to the lower wires when installing Then install it like this: You can install the holders These fixed bars are so installed: Then we put the mixing cylinder on, this must be stuck in place, otherwise, it will leak ink: Let’s put the lid on This O-ring must be put on: Get a little wet: Let’s put the lid on: With screws installed, the mixing cylinder is basically installed: Be sure to tighten the screws. Now put these two tubes on: Then install the solenoid valve: We installed the drive plate: Put the lines in order, 12345: And then we plug the lines in now: If these lines we want to tear down, we must remember, they are all in order, 12345 The jack above doesn’t have to be plugged in Then one of the ones here was supposed to be connected to the cleaning pump: Then this wire is connected to the condenser: Be sure to remember. Secure the pressure sensor, with a strap, be sure to secure it tightly: After this is fixed, then we plug in the line of the pressure sensor Just this hole, plugin here: The mixing cylinder is already in place. Special attention

Continue Reading

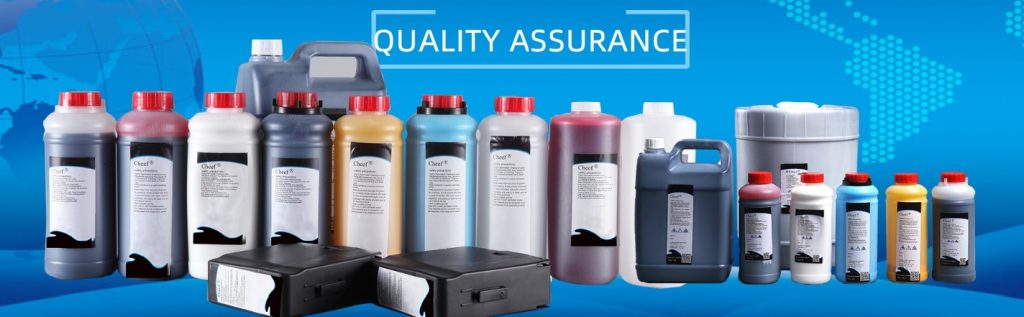
How to choose good quality inks?

Inks for printers have many types, then there are many models for that. One model related to one kind of ink. And inks we often call normal inks and special inks. Special inks have these types , like glass ink, anti-mobility ink,anti-alcohol ink,Halogen free ink,Optical-counterfeiting inkHigh-temperature ink,low-temperature ink. Then how we know which inks are good. From the outside , we could not know it ,only put them into printers to run it, and then know it. Normally goods inks have these performance. 1.No need to change the filters and run in the printers with good performanace, not have the printing not good, nozzle block and so on. 2.Good inks are with welled filter when making , not have any dirty inside. 3.Good inks could match the printers very well. About special inks, it means these inks could have the good performace on the surface of the special materials, like PE, milk, glass, and so on. Here are the video links for reference to view the sepcial inks’s peformance on the special material.

Continue Reading

connect

We'd love to have your feedback on your experience so far